Page header image
Module 5: Caption your own YouTube videos
Once your video is uploaded to your YouTube account, follow these steps:
- From your channel or account dashboard, click "YouTube Studio" on the right-hand side
of the screen.

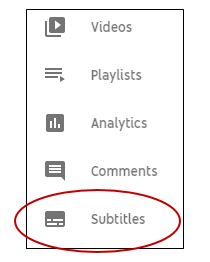
- Once in YouTube Studio, click on "Subtitles" on the left-hand side of the screen.
- Locate your video title and note the "Languages" area to the right (in between the
video title and "Upload date").
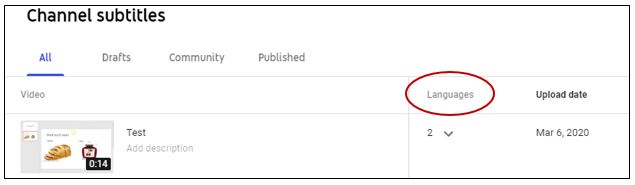
- In the "Languages" area, the number 2 should appear. If you only see the number 1,
exit out of your YouTube account, wait about 15-30 minutes and then log back in and
check for the number 2. If you had just uploaded the video this instant, it can take
a little time for YouTube to generate the auto-transcribed captions depending on the
length.
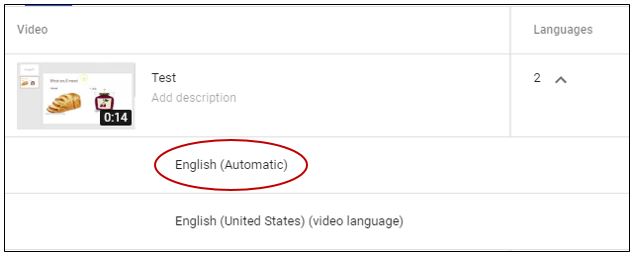
- Click on the number 2. Locate where it says "English (Automatic)". These are the
auto-transcribed captions which were generated by YouTube. They are not perfect and will need editing, but they are a quick way to get the bulk of your spoken text transcribed.
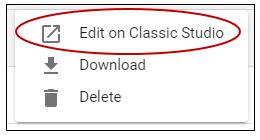
- Click on the three dots next to "Published" all the way to the right.

- Click "Edit on Classic Studio".
- You will then see your video with a time-stamped transcript to the left, and an audio
timeline below. The time-stamped transcript will be greyed out initially, so you'll
have to click "Edit" to make changes.
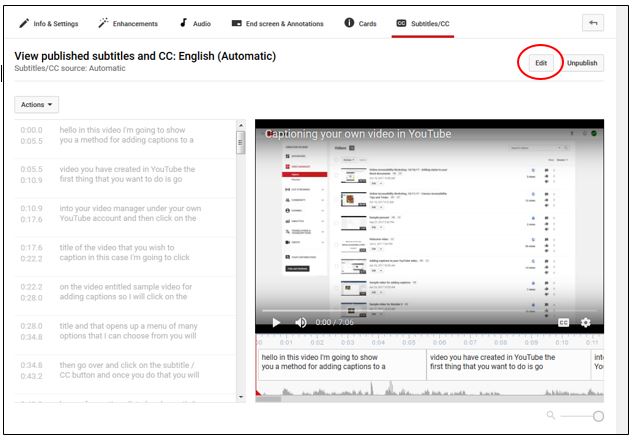
- Once you've clicked "Edit", your time-stamped transcript should now be active. Press
play on the video, listen to the audio, and read the captions that appear on the screen.
If you need to make edits to the captions, simply click on the associated box in the
time-stamped transcript. If you need to adjust the syncing, you can drag the handles
on either side of each text box in the audio timeline.
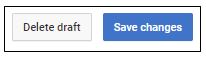
- Once you are finished editing your captions, click "Save changes".
Your video is now ready to be posted!