Page header image
Module 4: Fix an existing PDF for accessibility 
"A common method for making PDF documents is to place a paper copy of a document into a scanner and view the newly-scanned document as a PDF with Adobe Acrobat. Unfortunately, scanners only create an image of text, not the actual text itself. This means the content is not accessible to users who rely on assistive technology. Additional modifications must be made to make the document accessible." -- from the Adobe.com accessibility site
For this tutorial, we will assume that the existing PDF we want to fix is a scanned document (as described above).
-
If possible, fix accessibility errors in the source document (i.e. Word document)
-
Add accessibility features to the Word document, and then save as a PDF.
-
If the source document is not available, continue with Step 2 below.
-
-
Run the 'Make Accessible Wizard'
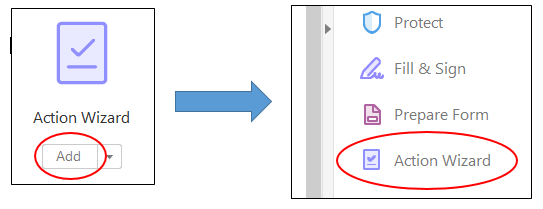
- Add the 'Action Wizard' to your toolbar.
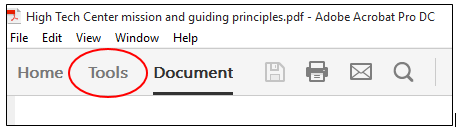
- In Acrobat Pro DC, click 'Tools' in the upper left corner. The tools menu will appear.
- Scroll down until you see 'Action Wizard'. Click 'Add'. You should now see the Action
Wizard on your toolbar at the right side of the screen.
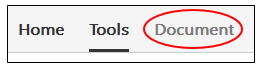
- Click 'Document' at the top to go back to your document.
- In Acrobat Pro DC, click 'Tools' in the upper left corner. The tools menu will appear.
- Run the 'Make Accessible Wizard'
- Click on 'Action Wizard', and then 'Make Accessible' in the Actions List that appears. Note that under "Files to be processed" your document
title should appear.

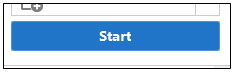
- Click 'Start'.
- The wizard will begin. Click through each screen, following the prompts. Below is
text and image information about each screen, followed by a brief video demonstration
of how to run the wizard.
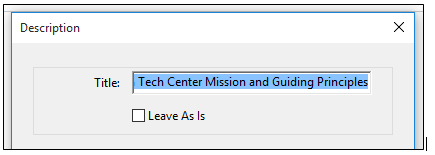
- Description: Include a title for your document because this is what will be announced first to
someone using a screen reader, and lets them quickly determine if this is the document
they want to read.
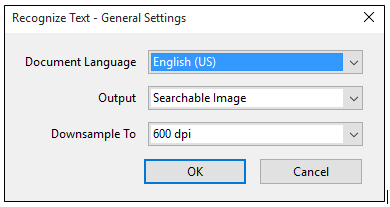
- Recognize Text - General Settings: The wizard will scan the document and detect any text it sees. This is known as "Optical
Character Recognition", or OCR. You can also select the language of the document.
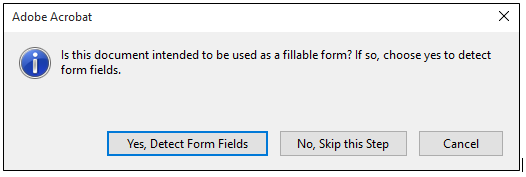
- Is this document intended to be used as a fillable form?: If your PDF is a fillable form, you can select "Yes, Detect Form Fields".
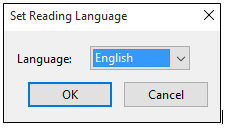
- Set reading language: This allows you to set the language which screenreading software will use when it
voices the content.
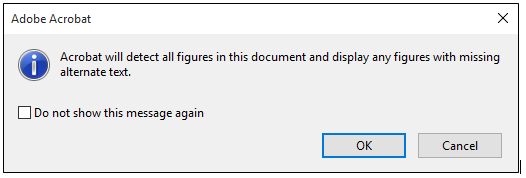
- Acrobat will detect all figures in the document and display any figures will missing
alternate text: If any images without alternate text are found, it will take you through the process
of adding it for each image.
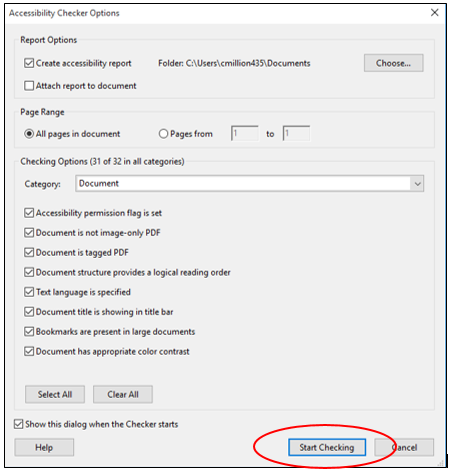
- Accessibility Checker Options: I recommend leaving all the settings as is. This will ensure a thorough check of
the document's accessibility. Click "Start Checking".
-
Once you run the Accessibility Checker, you will see a results panel appear to the left with symbols next to each criteria checked. Items that "passed" will have a green check mark. Items that "failed" will have a red X.
 NOTE: The checker will always recommend that you manually check Logical Reading Order and Color Contrast. Color contrast can only be changed in the source document, but scroll further down
the page for how to check logical reading order.
NOTE: The checker will always recommend that you manually check Logical Reading Order and Color Contrast. Color contrast can only be changed in the source document, but scroll further down
the page for how to check logical reading order.For items that failed the check, right-click on the item. You can select "Fix" to go through steps to fix the problem, "Explain" for information about what the problem means, or "Skip Rule" if you've already addressed the problem.
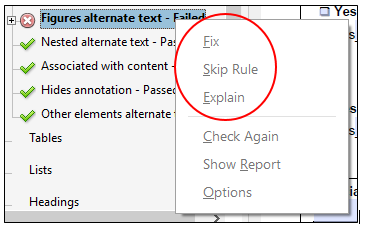
If you are requiring further assistance with fixing errors that arise from your Accessibility Check, contact DSS. We will walk you through it!
Here is a brief video demonstrating how to run the 'Make Accessible Wizard':
- Description: Include a title for your document because this is what will be announced first to
someone using a screen reader, and lets them quickly determine if this is the document
they want to read.
- Click on 'Action Wizard', and then 'Make Accessible' in the Actions List that appears. Note that under "Files to be processed" your document
title should appear.
- Add the 'Action Wizard' to your toolbar.
-
Correct OCR errors
In the process of recognizing text that took place in the 'Make Accessible Wizard', Acrobat may have mis-identified certain words or characters. This happens often when older documents are scanned. The following process allows you to check for any errors and correct them.
- Close the 'Make Accessible Wizard' by clicking on the X in the top right corner.
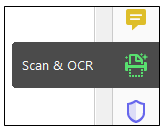
- Click 'Scan & OCR' in the toolbar. The Scan & OCR toolbar will appear above the document.

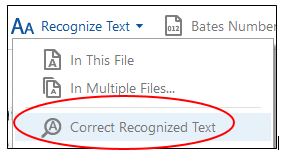
- Click "Recognize Text", and then "Correct Recognized Text". Acrobat will scan the
document and locate any characters it was not 100 percent sure about during the OCR
process (i.e. "suspects").
- If a suspect is detected, you'll see a red box around it in the document. In the toolbar,
you'll see an image of the suspect and then what Acrobat recognized it as. If it got
it wrong, you can type the correct spelling in the "recognized as" box, and then click
"Accept" to move onto the next suspect.
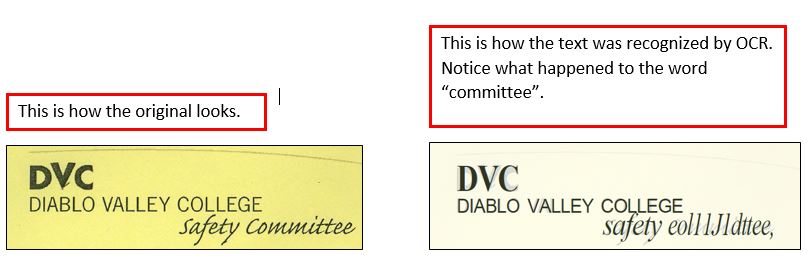
- Does your document have any words that are written in cursive or a really decorative
font? If so, it's a good idea to take one more step to ensure that the OCR was recognized
correctly, even if no suspects were detected.
- Click "Recognize Text", and then "Correct Recognized Text". After you are told that
Acrobat did not detect any suspects, check the box next to "Review Recognized Text".

- You should now see the original text of the PDF covered by the OCR text. In other
words, Acrobat will place the text it recognized directly on top of the original text
so you can review it. Usually it's correct, but for cursive or decorative fonts,
it can be very wrong. Consider the following example:
- To fix any errors you find, simply double-click on the misrecognized word. A red
box should appear around it, and the review bar should show the original text and
what it was recognized as.
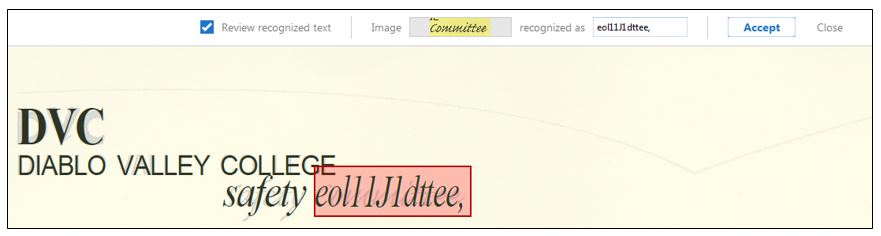
- Now, you can correct text by clicking in the "recognized as" box and typing the correct
word. Then click "Accept".

- You'll now notice that the word appears correctly. It's appearance will not be changed
in the original document, but the OCR has been adjusted to read the proper word when
using screen-reading software.

- Click "Recognize Text", and then "Correct Recognized Text". After you are told that
Acrobat did not detect any suspects, check the box next to "Review Recognized Text".
- Close the 'Make Accessible Wizard' by clicking on the X in the top right corner.
-
Check logical reading order
-
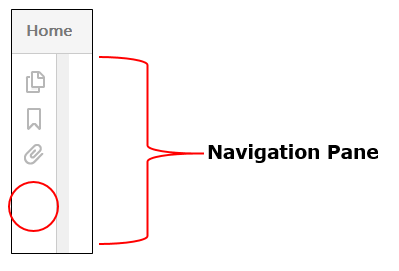
Add the "Order Panel" to the Navigation Pane.
-
Move your cursor over to the white space within the Navigation Pane to the left.
-
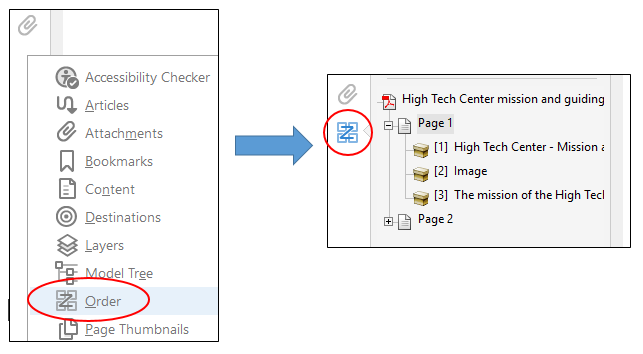
Right-click your mouse, and then click "Order" in the menu that appears. The Order Panel will then appear on the Navigation Pane and will open by default.
-
Once in the Order Panel, you can click on each item and see it highlighted in the document. It will also have a number assigned to it to show the order in which it will be read.
-
- Rearrange items as needed.
-
This is as simple as clicking and dragging the item and moving it to the desired spot within the Order Panel. Note the change in reading order number after moving the item.
-
Once finished, click the X in the Order Panel to close it.
-
-
-
Run a test using a free screen-reader
Congratulations!
You have now completed Module 4: Accessible PDFs